Tutorial
Powerful data and design tools at your fingertips.
Create new Single Listing Project
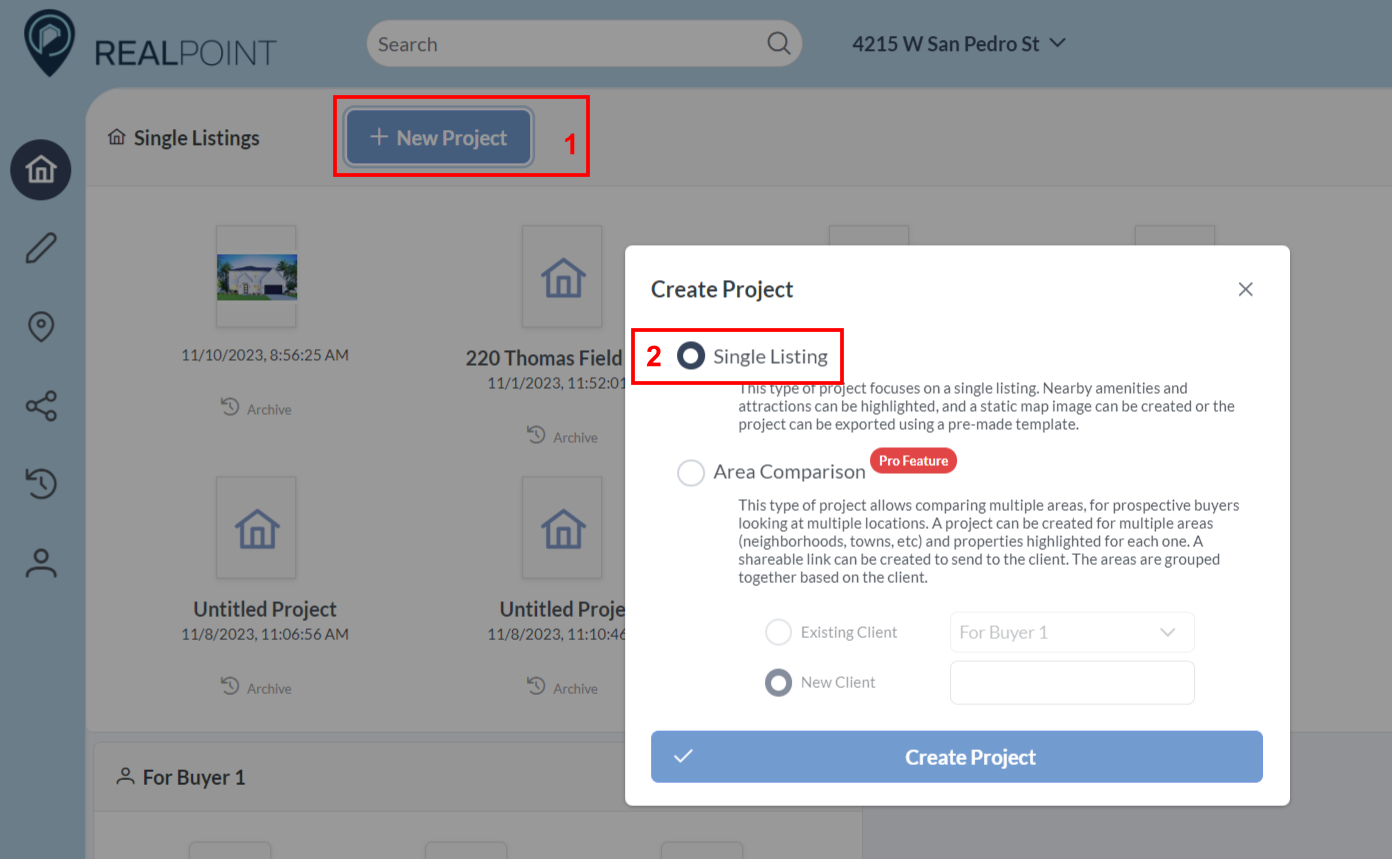
1. Select create “New Project” button
2. Create New Project window will pop up. Select “Single Listing” radio button then click “Create Project”
3. Create Single Listing map homepage will open **we should lock the pen button on homepage and force them to go through the “New Project” button, right? Idk.**
Design Map and Add Listing
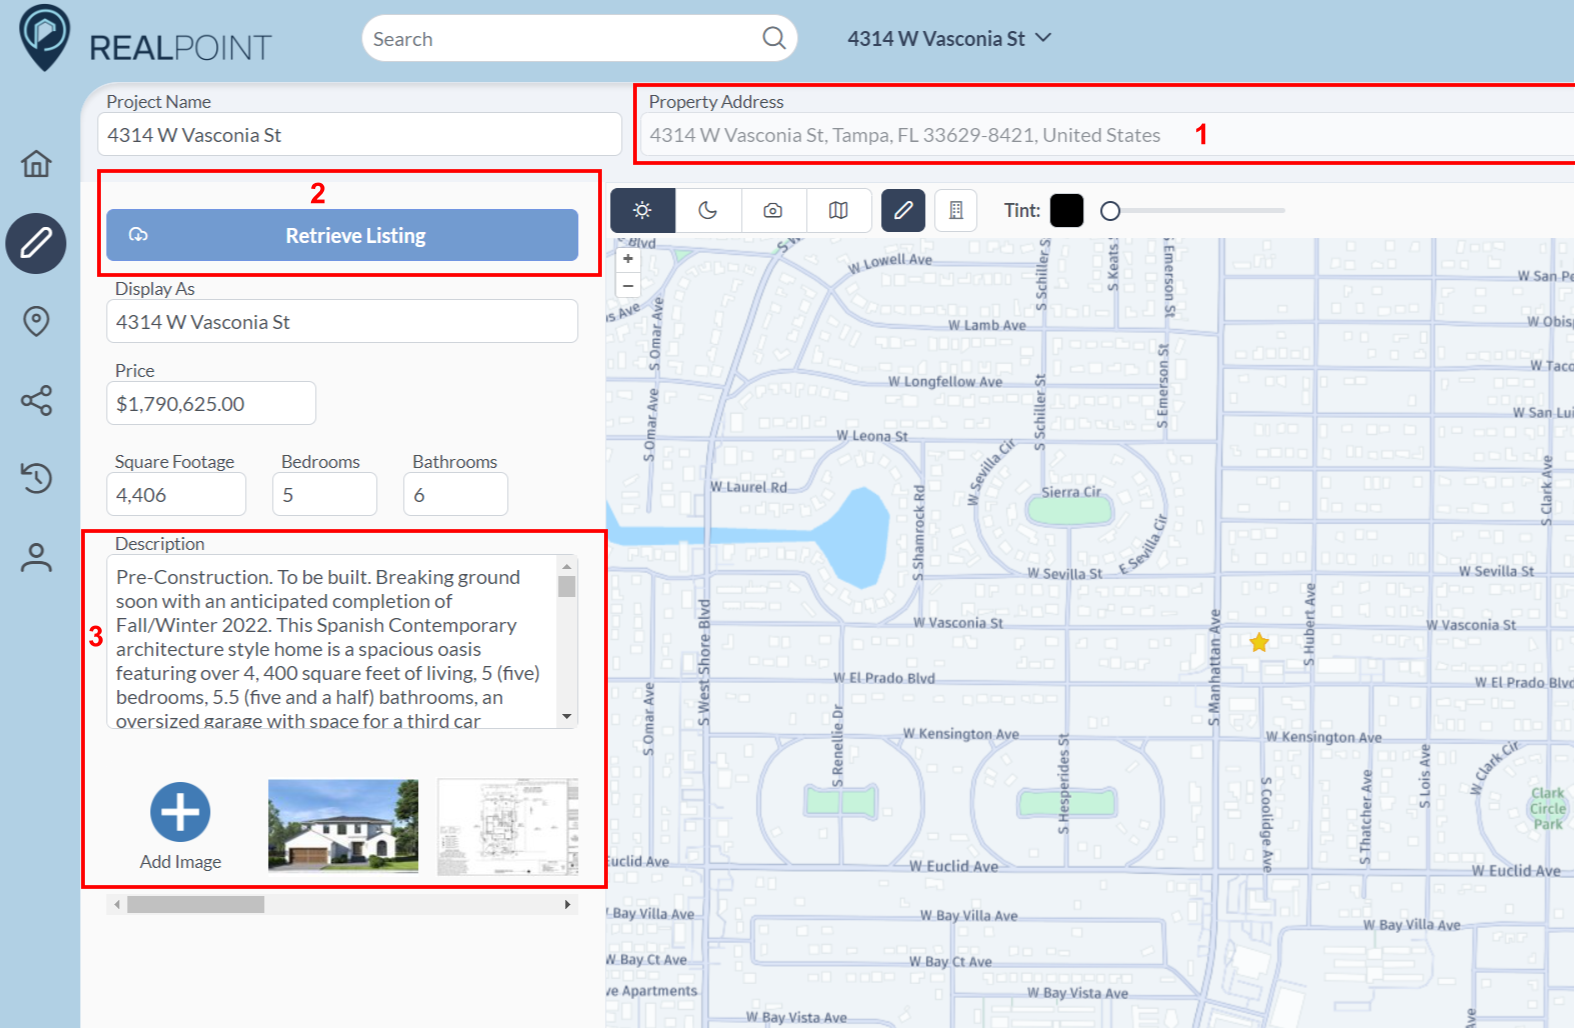
1. Enter address and click “Search”
2. Retrieve Listing
a. Click retrieve listing. If the property is a live listing, the description and posted photos will populate
3. Add photos and/or custom description
a. If the listing is not live or was just posted, the photos and description may not be available yet. The user can upload photos and create a description in RealPoint
4. Changes Auto-save
Choose POIs
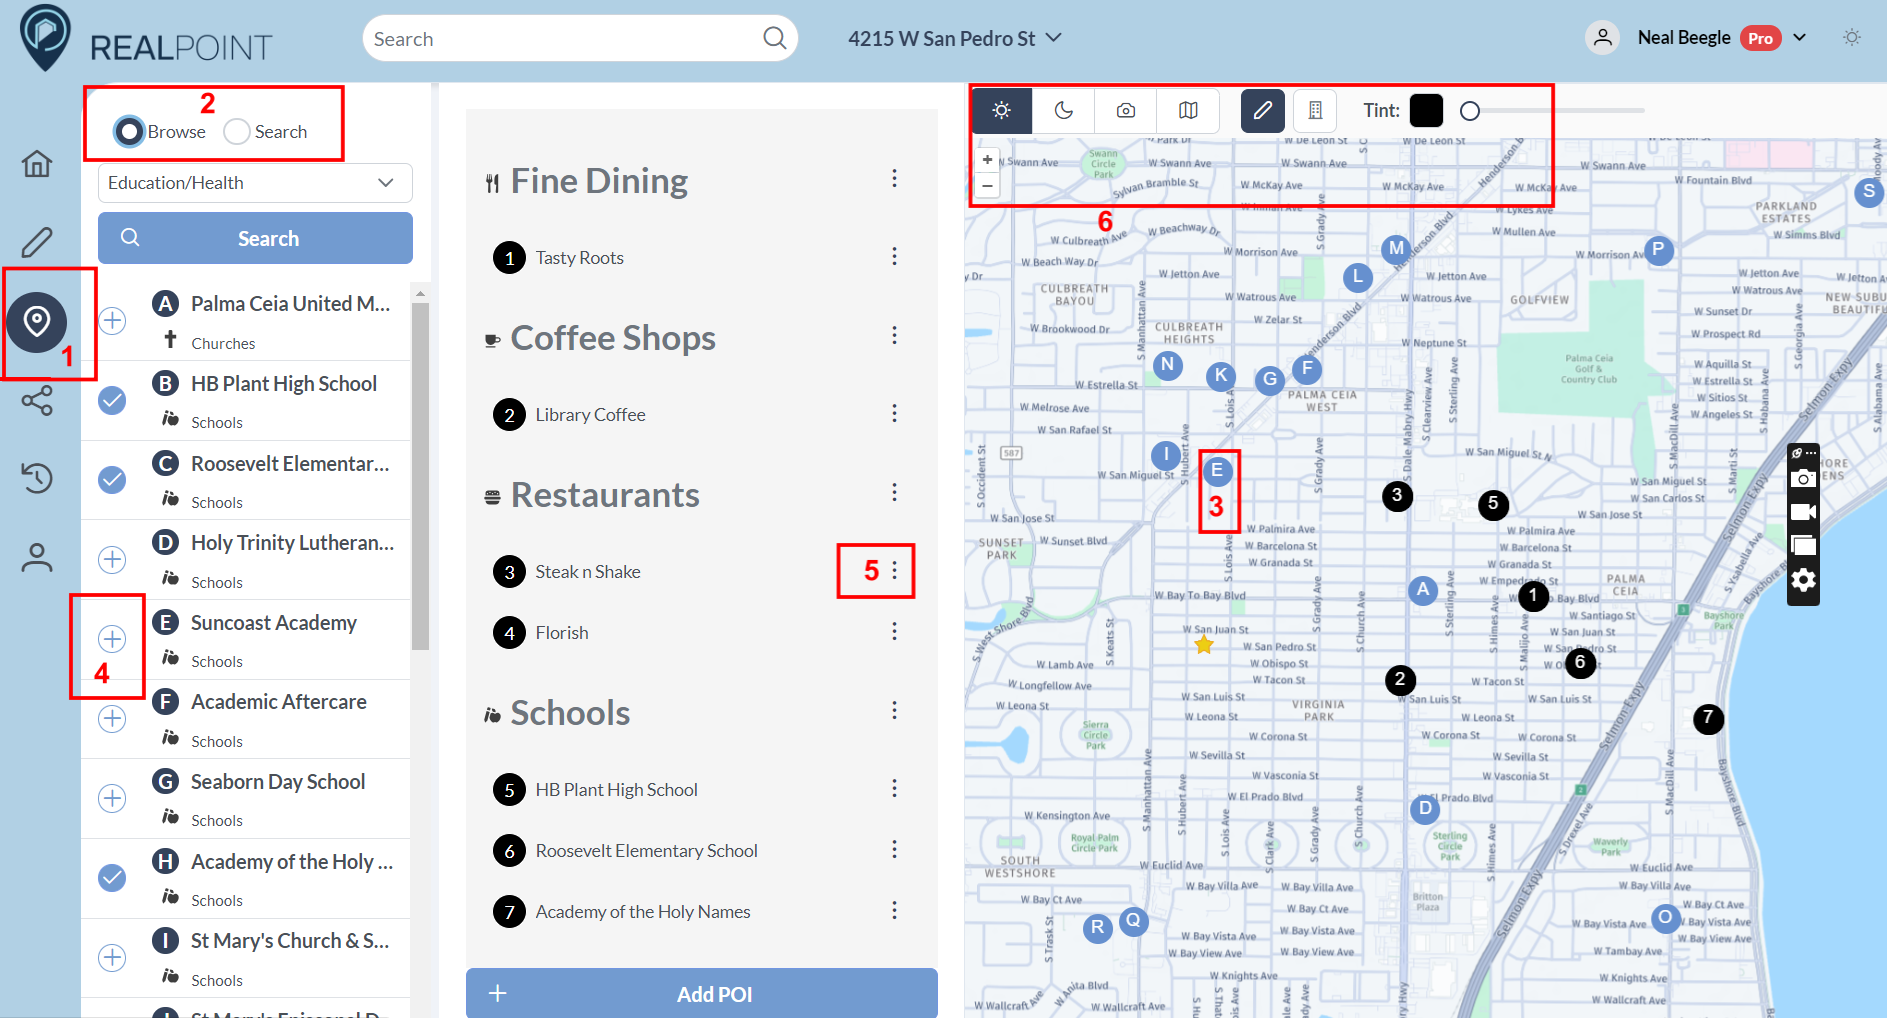
1. On the left toolbar, click the map point icon
2. To Browse, click the “Browse” radio button then select the category you’d like to work on. Click “Search” and it will pull in all the POIs in that category in your designed map area
3. The POIs will show on the map as letters until selected.
4. Select a POI by clicking the “Plus” icon to the left of the listed item
5. Once selected, users can change the sub-categories and move the order by clicking on the “…” next to the POI in the list
6. In the toolbar on the map, the users can choose between map styles for an aesthetic that fits and change the zoom level/map area
Create Flyer Design
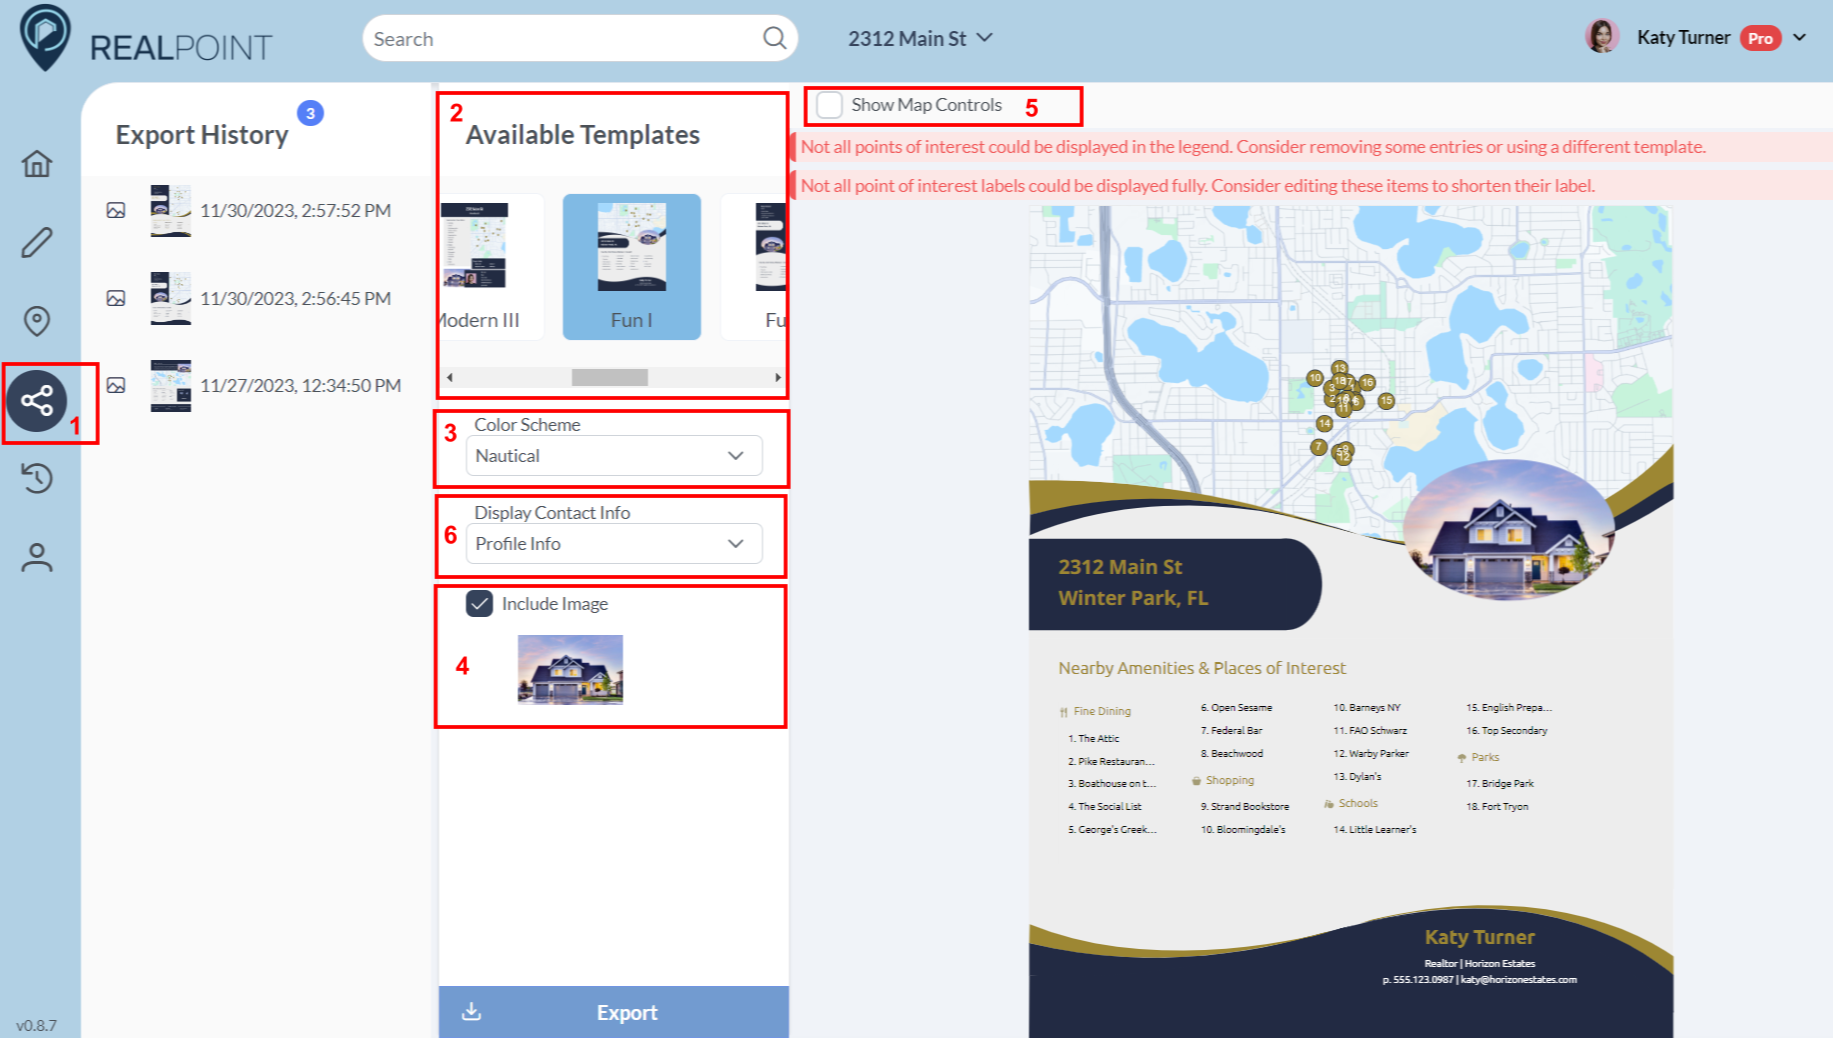
1. Click on the “Share” button on the left toolbar
2. Select between available templates
3. Choose what color palette you would like to use
4. Choose whether or not to include a picture
5. Select “Show Map Controls” to change zoom levels, move map, and make any final map edits. THESE CHANGES WILL ONLY BE REFLECTED FOR THIS TEMPLATE
6. Choose to include your Personal Information, No information, or your Custom User Card
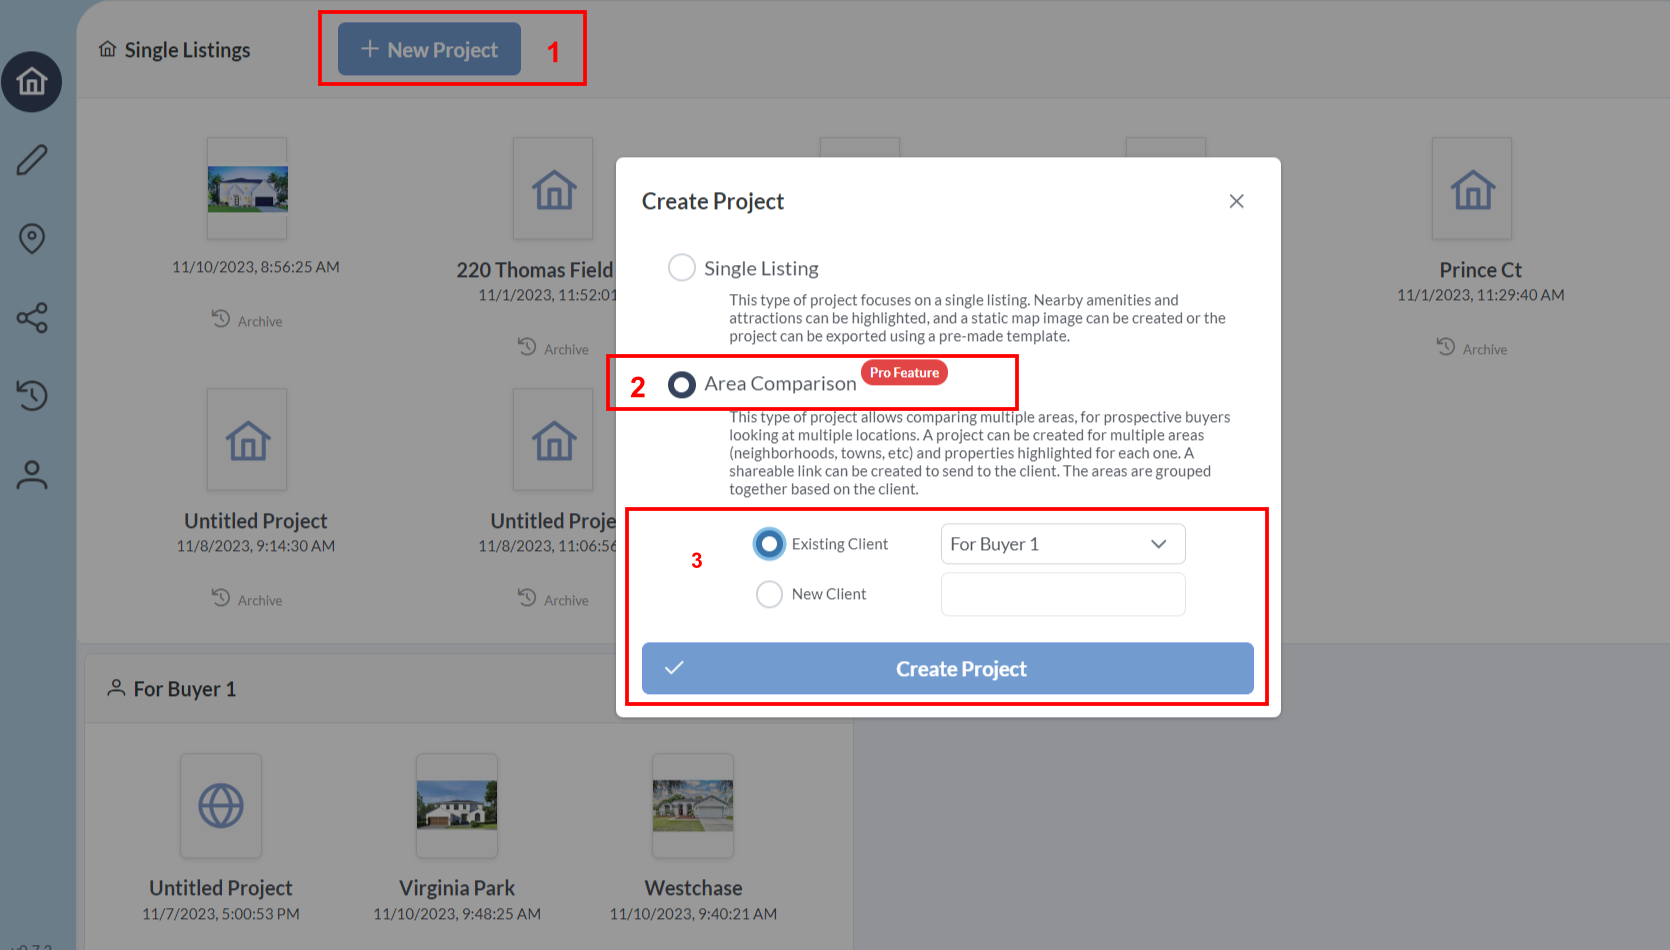
Create an Area Comparison Project
1. Select create New Project button
2. Create New Project window will pop up. Select “Area Comparison” radio button
3. Select an existing client or create a new client then click “Create Project”
4. Area Comparison map homepage will open
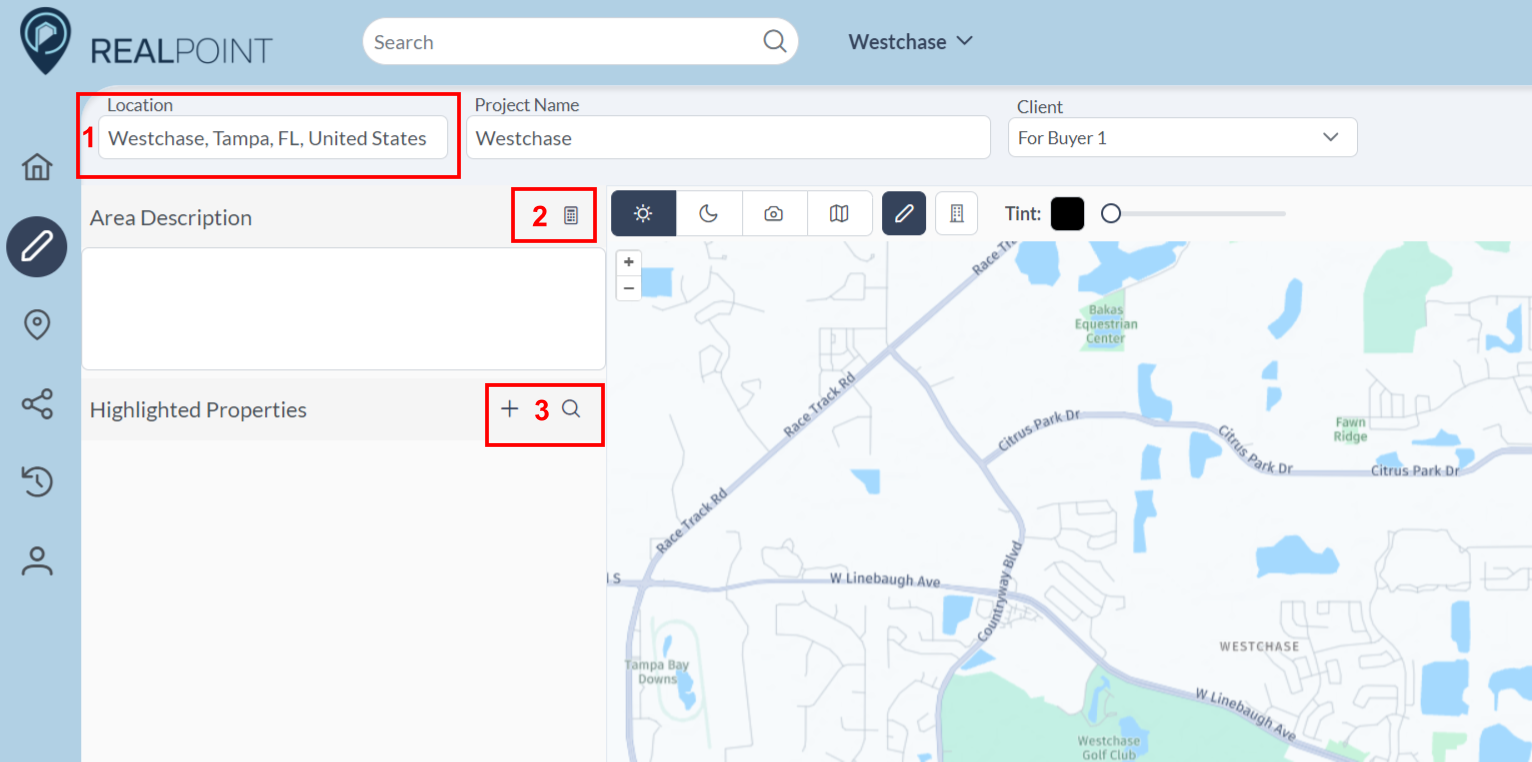
Create Area
1. Search for neighborhood in the “Location” field OR zoom the map to your desired area
2. Use AI generator to write area description (or write one yourself)
a. Click the calculator next to “area description” box to let AI write a description of your selected neighborhood
b. Once you add your Points of Interest on the next page, you can return to regenerate your description. The AI will take your selected POIs into account when writing your description. Example: if you focused on schools and parks as your POIs, the AI tool will take that information for the description.
3. Click on the “Highlighted Properties” search button to pull up listing search
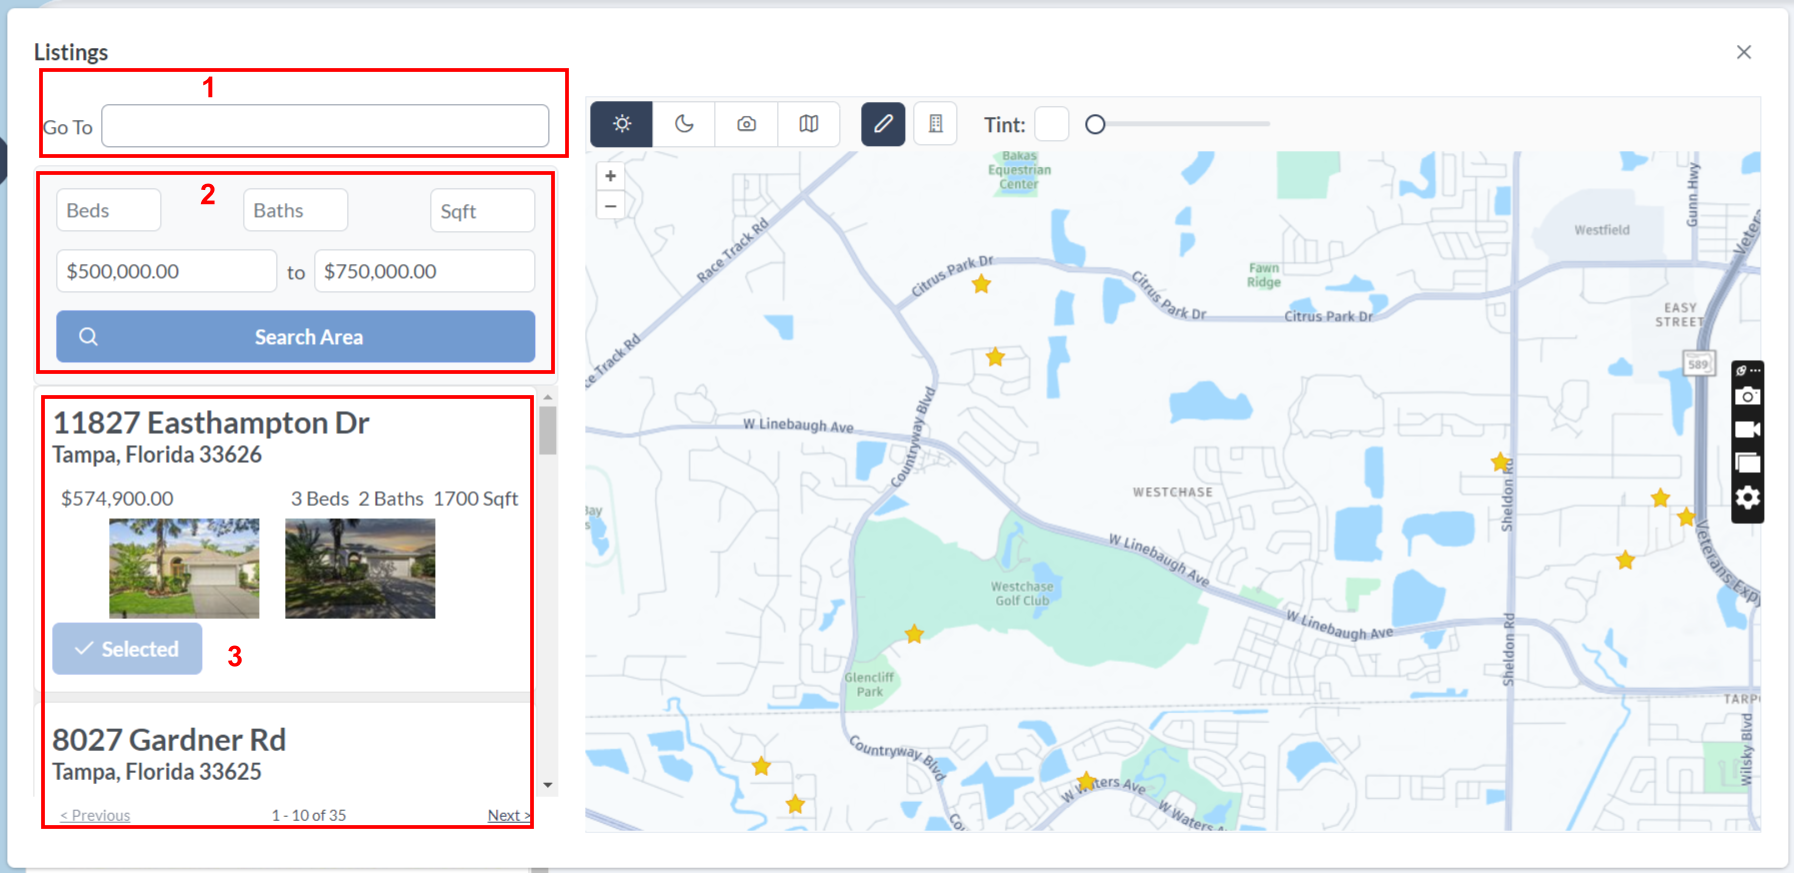
Add Listings to Area Comparison
1. Created area will pull in, but you can change the area from here as well by searching in “Go-to” field or manual zoom…
2. Set your listing parameters and find listings
3. Select which listings to include in your area report
4. Exit pop-up to get back to map
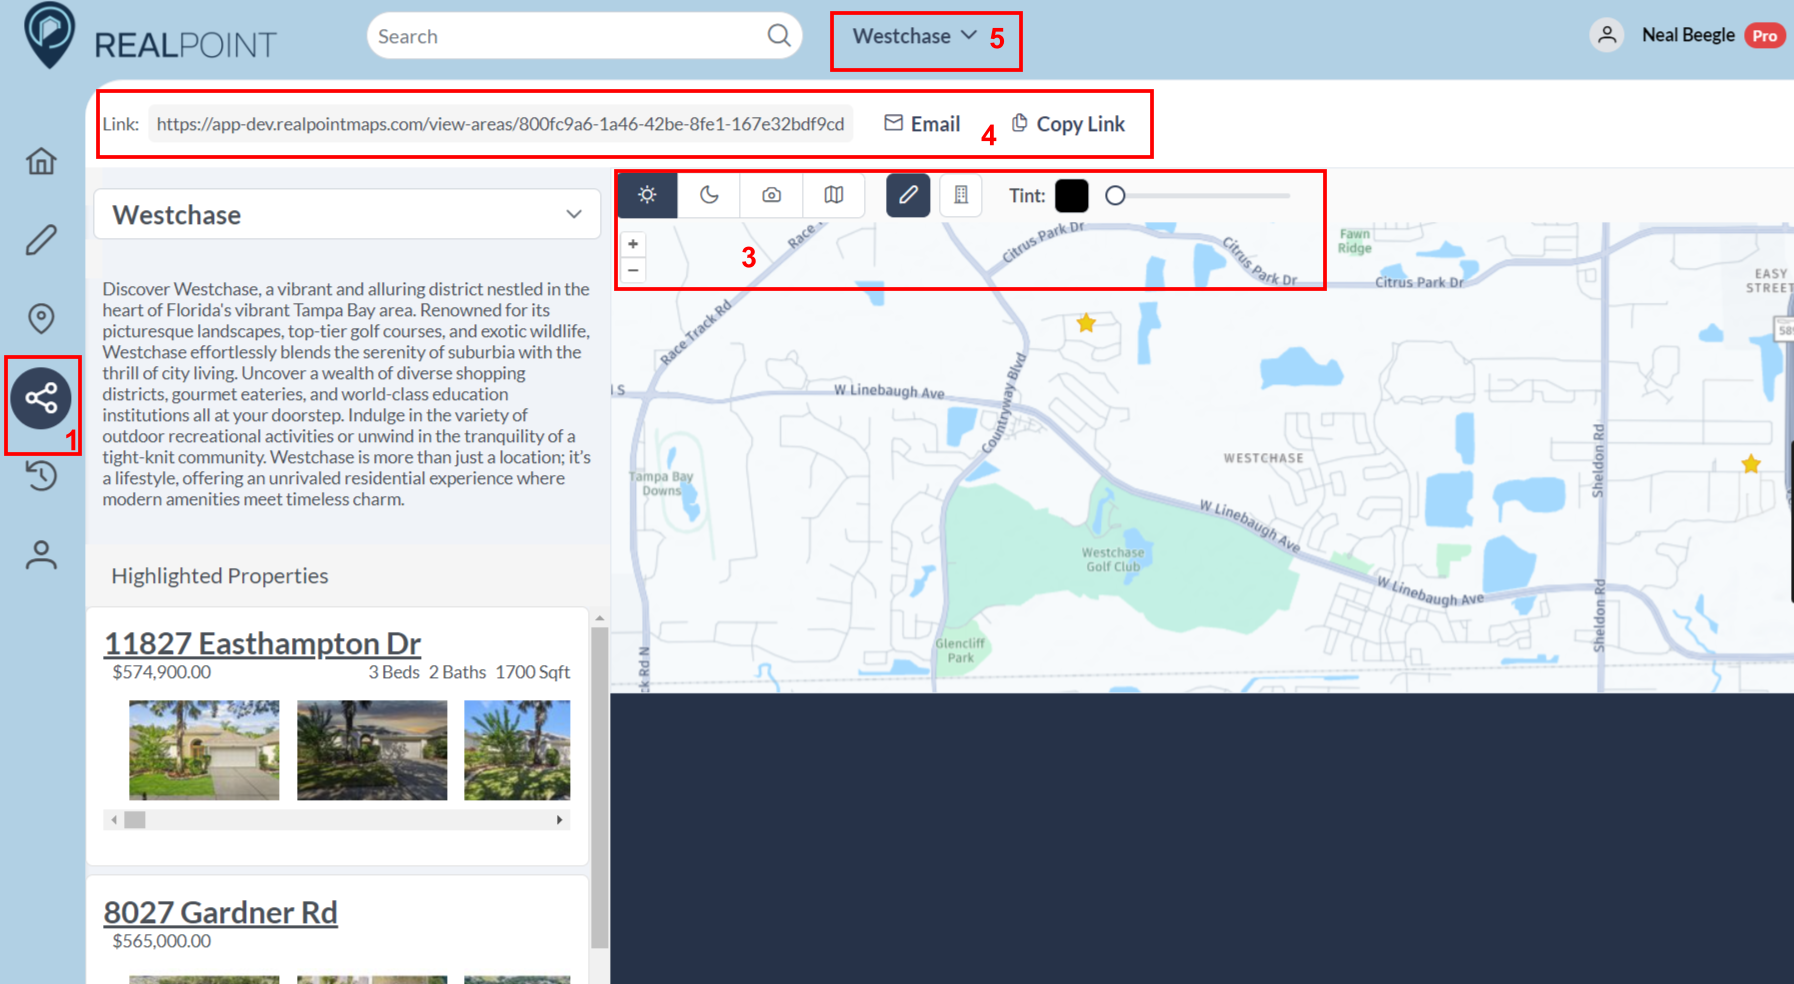
Share Area Report with Clients
1. Click the “Link” button on the left toolbar
2. This will bring you to the report page. This is what your clients will see when you share the report.
3. On this page, you can also edit the maps
4. To share this page, choose to either Copy the link and send it manually, or send by E-mail directly from the App.
5. If there are multiple areas, your clients will be able to switch back and forth between the different areas you have created
*** Your clients will NOT be able to add listings or POIs to this report, this is only for them to view.
Update your plan
1. Click on your name in the top right corner of the homepage
2. Select “Profile” on the drop-down
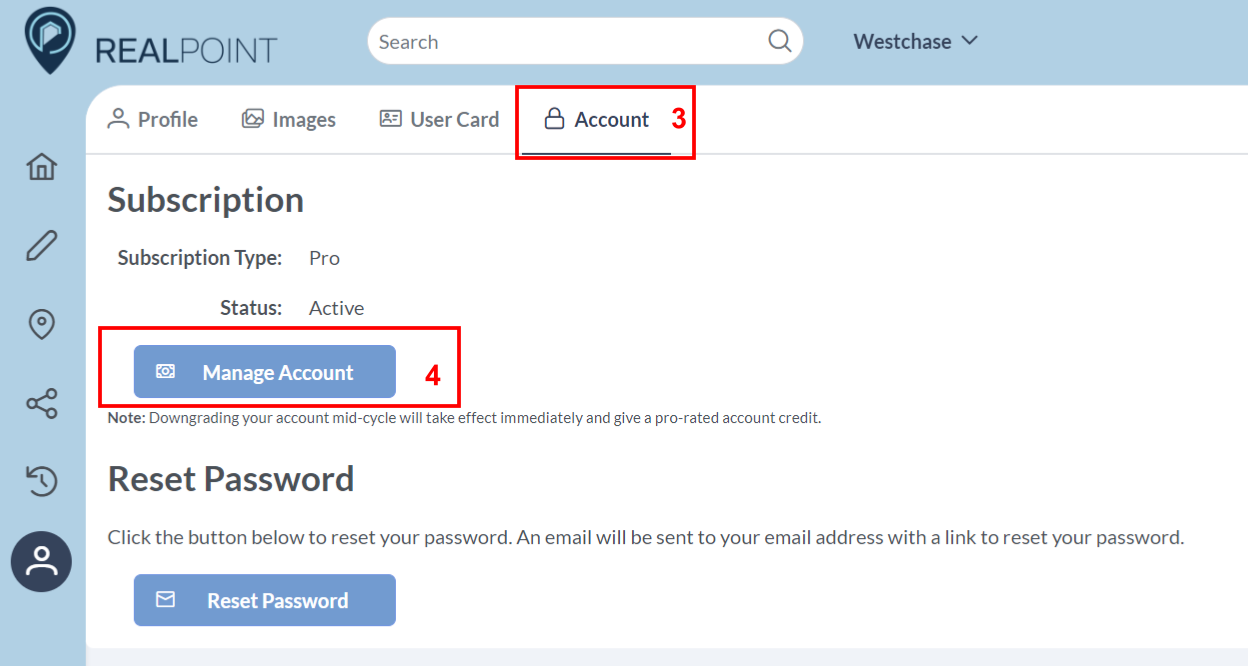
3. Select “Account” in the top menu bar
4. Click the “Manage Account”
5. Update plan or Cancel plan from there
Edit User Info
1. Click on your name in the top right corner of the homepage
2. Select “Profile” on the drop-down
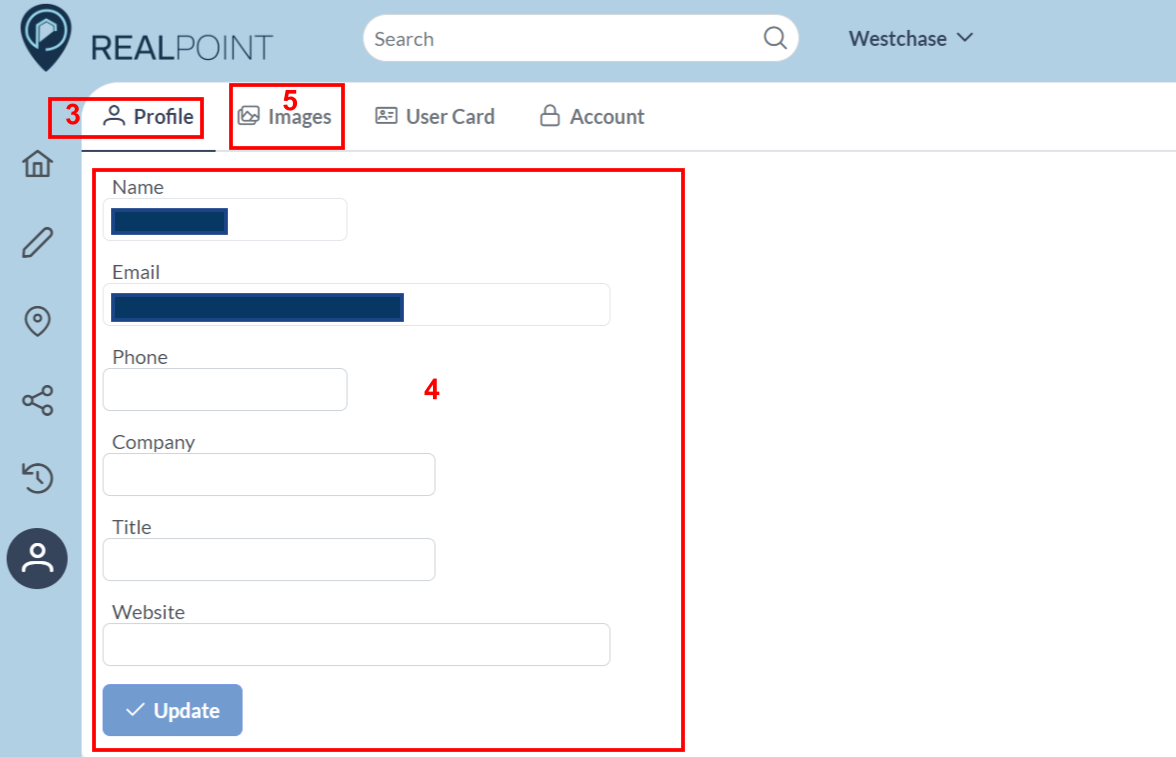
3. Select “Profile” on top menu
4. Edit your information
5. Select “Images” from top menu
6. Upload Profile image and Company Logo here

